Snapseed for Android and iPhone: How to Edit Photos Professionally Without Paid Photo Editors
Professional-looking photographs no longer require expensive editing software or a computer. Snapseed, Google’s free photo editor for Android and iPhone, offers an extensive collection of tools for correcting lighting, improving colours, retouching portraits and giving ordinary smartphone pictures a more polished appearance. Unlike many photography apps, Snapseed does not require a subscription, display advertisements or add watermarks to finished images. Its editing features are suitable for everyday pictures, travel photography, portraits and content intended for social media. However, achieving convincing results depends less on choosing dramatic filters and more on understanding how individual adjustments work together. With a sensible editing routine, even photographs taken in difficult lighting can be noticeably improved without spending money on specialist software.
What Makes Snapseed a Practical Alternative to Paid Photo Editors?
Snapseed is developed by Google and is available through Google Play for Android devices and Apple’s App Store for iPhone and iPad. In 2026, its official listings describe more than 30 professional editing tools and filters, including controls for exposure, colour, image geometry and selective adjustments. The application is free to use, with no paid membership required to access its editing functions. This makes it particularly useful for people who regularly photograph products, family occasions, landscapes or everyday activities but cannot justify paying for an advanced editing subscription. Although Snapseed cannot replace every function of a desktop editor, it provides considerably more control than the basic adjustments found in many phone galleries.
One important advantage is the ability to edit individual parts of a photograph rather than applying every adjustment to the entire image. For example, Snapseed can brighten a face without making the surrounding sky excessively pale, reduce distracting background elements or correct colours that appear unnatural under indoor lighting. Its Healing tool removes small unwanted objects, while Curves provides more precise brightness control than a simple exposure slider. Other functions include Perspective correction, White Balance, Lens Blur and several film-inspired effects. These tools allow photographers to address specific weaknesses in an image instead of relying on a filter that changes everything at once. The most convincing results usually come from combining several restrained adjustments.
Snapseed also supports non-destructive editing, allowing users to revisit adjustments or return to their original photographs. This is particularly helpful when experimenting with unfamiliar tools because an unsuccessful adjustment does not mean the photograph must be abandoned. The application can open JPEG images and supported RAW files, although RAW compatibility depends on the camera and file format. There are also differences between Android and iPhone versions, particularly in how newer functions are presented. During 2026, the iPhone edition received updates involving its editing interface, camera functions and additional creative effects. Android users should therefore follow the controls available in their installed version rather than assume every menu looks identical across devices.
Installing Snapseed and Preparing Your First Photograph
To install Snapseed, search for its official listing in Google Play or the App Store and check that Google LLC is identified as the developer. On iPhone, the current App Store requirements specify iOS 17.0 or later, while Android compatibility depends on the device and available app version. After installation, allow access to the photographs you intend to edit. Opening an image usually involves selecting it from the photo library or using the import controls provided by the application. Before making changes, inspect the original at full size. Look for problems such as an uneven horizon, distracting objects, unnatural colours, excessive darkness or overly bright areas. Identifying these weaknesses first helps prevent unnecessary editing and keeps the finished photograph closer to the original scene.
The editing interface generally organises adjustments into tools and ready-made photographic looks. The exact arrangement varies between app versions, but the underlying principle remains straightforward: choose an adjustment, modify its settings and confirm the result. Traditional Snapseed controls commonly use vertical gestures to select adjustment types and horizontal gestures to change their strength. Some newer interfaces provide additional visible controls. A useful first exercise is to open a landscape photograph and adjust only its brightness, contrast and white balance. Compare the edited photograph with the original after each change. This simple practice makes it easier to understand which controls improve the image and which merely make it look more dramatic.
Before beginning detailed editing, consider where the final photograph will appear. A picture intended for Instagram may benefit from a different crop than one prepared for a website, online shop or printed album. A vertical composition often suits smartphone viewing, while a wider photograph can preserve more environmental detail. It is also sensible to retain the original file, particularly when editing important personal photographs or client images. Although Snapseed provides options for reversing adjustments, saving an additional copy offers greater flexibility when working across different devices. Good preparation reduces repeated work and makes it easier to produce several versions of the same photograph without losing its original appearance.
How to Edit Photos Professionally in Snapseed Step by Step
The most effective editing sequence begins with the composition rather than colour effects. Open the Crop tool and remove unnecessary areas around the subject, making sure important details remain comfortably inside the frame. Use Rotate to straighten a tilted horizon and Perspective to correct buildings or interiors with visibly sloping vertical lines. Perspective correction is especially useful for photographs taken while pointing a smartphone upwards at tall structures. However, strong corrections can stretch certain parts of an image, so small changes usually look more natural. Check the edges after adjusting the composition because automatic corrections may leave unwanted areas or remove details. A balanced frame often improves a photograph more than an elaborate filter.
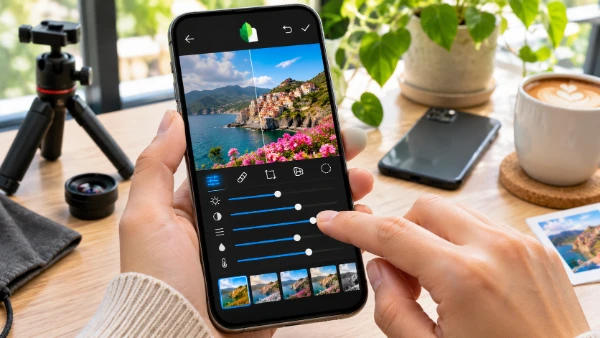
Next, correct lighting using the main adjustment controls, known as Tune Image in traditional versions and presented through updated adjustment interfaces in newer releases. Begin with overall brightness, then consider contrast, highlights and shadows. If a person is standing in front of a bright window, lowering highlights may restore some visible detail outside, while increasing shadows can improve the appearance of the face. Avoid raising shadows excessively because dark areas may contain visible image noise, particularly in photographs taken at night. Ambiance can help balance the appearance of a scene, but its effect should be assessed alongside other changes. A useful rule is to make one adjustment at a time and compare the result with the original before continuing.
Colour correction should follow lighting adjustments. White Balance helps remove unwanted colour casts caused by artificial lighting, shade or mixed light sources. For instance, a photograph taken beneath warm household bulbs may appear noticeably yellow, while a shaded outdoor portrait may look too blue. Adjusting temperature and tint can restore more believable colours. Saturation should be used carefully: excessive increases can make grass unnaturally green and skin appear orange. The Details tool offers sharpening and structure adjustments that can improve textures, but high settings may exaggerate skin imperfections or create harsh edges. For most photographs, natural colours and moderate detail enhancement produce more convincing results than maximum contrast, saturation and sharpness.
Retouching Portraits, Removing Objects and Improving Backgrounds
Portrait photography benefits from selective editing because faces, hair, clothing and backgrounds rarely require identical corrections. Snapseed’s Selective and Brush tools allow changes to specific areas without affecting the whole photograph. For example, a face photographed beneath a tree may need additional brightness while the background already has correct exposure. Depending on the installed version, selective controls and masking features can help isolate the relevant area. The Portrait tool provides further options for adjusting facial lighting and appearance, with newer iPhone updates offering more targeted facial adjustments. Use these functions conservatively. Excessive skin smoothing removes natural texture, while aggressive brightness corrections can make the face appear disconnected from the surrounding light.
The Healing tool is particularly useful for removing small distractions, including dust marks, distant people, minor blemishes or objects against relatively simple backgrounds. Zoom into the photograph, choose Healing and brush over the unwanted element. Snapseed attempts to replace the selected area using information from nearby parts of the image. This works best where the surrounding textures are consistent, such as an uncluttered wall, open sky or section of pavement. Complicated backgrounds, repeating patterns and objects crossing detailed edges are more difficult to repair convincingly. Rather than trying to remove a large object in one movement, work on smaller areas and inspect the result between corrections. If the replacement looks blurred or distorted, undo the adjustment and try a more limited selection.
Background adjustments can also improve subject separation. Lens Blur softens areas outside the main point of interest, producing an effect similar to the shallow depth of field associated with portrait photography. It can be helpful when the original background is visually busy, but excessive blur may create unnatural transitions around hair, glasses or clothing. A more subtle alternative is to lower background brightness slightly or reduce its saturation while keeping the subject correctly exposed. For photographs intended to look realistic, the original lighting direction should remain consistent. A portrait taken in soft daylight should not suddenly resemble a heavily illuminated studio photograph. The aim is to guide attention towards the subject without making the editing itself the most noticeable feature.
Advanced Snapseed Features, Creative Effects and Exporting Photos
Once basic corrections are complete, Snapseed offers several tools for more individual photographic styles. Curves allows precise adjustments to tonal relationships, including making shadows deeper or highlights brighter without treating every part of the photograph equally. Colour HSL controls, where available, provide separate adjustments for different colour ranges, which can help reduce overly strong greens or correct distracting background colours. Film-inspired filters, Grain and Black & White effects offer alternative appearances without requiring external presets. More recent iPhone releases have also introduced effects such as Halation and Bloom, designed to imitate particular characteristics of traditional film and optical diffusion. These effects work best when they suit the photograph’s lighting and subject rather than being applied automatically to every image.
RAW editing is another useful feature for photographers who want more flexibility than ordinary JPEG files provide. RAW photographs preserve camera information that may allow greater control over exposure, colour and white balance, provided the particular file is supported. This can be valuable when recovering detail from challenging lighting conditions. However, RAW editing cannot repair every photographic mistake. Completely overexposed highlights, strong motion blur and severely out-of-focus subjects may remain problematic. Modern smartphones also process photographs computationally, so a camera’s JPEG or HEIC image may sometimes look more finished immediately than its corresponding RAW file. RAW is therefore most useful when the photographer wants additional control and is prepared to spend more time developing the image.
For a consistent photographic style, Snapseed provides reusable editing looks and related tools for applying preferred adjustments. Current official listings also describe batch-editing functionality, although the exact controls and availability can vary between Android and iPhone releases. Reusing a look is convenient when editing photographs from the same event or creating a visually consistent social media gallery. Nevertheless, identical settings do not always produce identical results. Two photographs taken under different lighting may require separate exposure and white balance adjustments even when sharing the same overall style. Check each image individually, especially portraits and product photographs where accurate colours matter. A reusable editing style should save time without preventing necessary corrections to individual pictures.
Saving High-Quality Images and Avoiding Common Editing Mistakes
After completing the adjustments, review the photograph at both normal viewing size and full magnification. At normal size, consider whether the composition feels balanced and whether the subject attracts attention naturally. At full magnification, examine fine details for unwanted sharpening, visible noise, irregular retouching or blur around object edges. Compare the edited result with the original rather than relying entirely on memory. An image that initially appears impressive because of intense colours may seem less convincing after a brief comparison. If the photograph looks overprocessed, reduce the strongest adjustments before exporting. It is usually easier to introduce a little more contrast later than to correct an image whose highlights, shadows and colours have all been pushed too far.
Snapseed provides saving and export options for creating a finished image, with the exact wording depending on the operating system and application version. On Android, traditional export controls include options such as Save, Export and Export as, although their behaviour differs and some may preserve editing information differently. On iPhone, saving a copy or exporting through the available sharing controls can help keep the original photograph separate. For websites and social media, JPEG is a practical choice because it is widely supported and usually produces manageable file sizes. Before publishing, inspect the exported file rather than assuming it looks identical to the editing preview. Repeatedly saving and recompressing JPEG images can gradually reduce quality, so retain a high-quality original or master copy whenever possible.
The most common editing mistakes involve trying to correct every perceived weakness with strong settings. Excessive sharpening produces harsh outlines, extreme saturation makes colours less believable, and heavy portrait retouching can remove individual facial characteristics. Another frequent problem is applying the same filter to photographs taken in completely different conditions. A warm sunset image and a cool indoor portrait rarely benefit from identical colour adjustments. Snapseed is most effective when each tool solves a specific problem and the final image still resembles a believable photograph. For everyday photography, a reliable routine is to straighten and crop the image, balance exposure, correct white balance, make selective improvements and export a carefully checked copy. With practice, this approach delivers consistent results without requiring a paid photo editor.